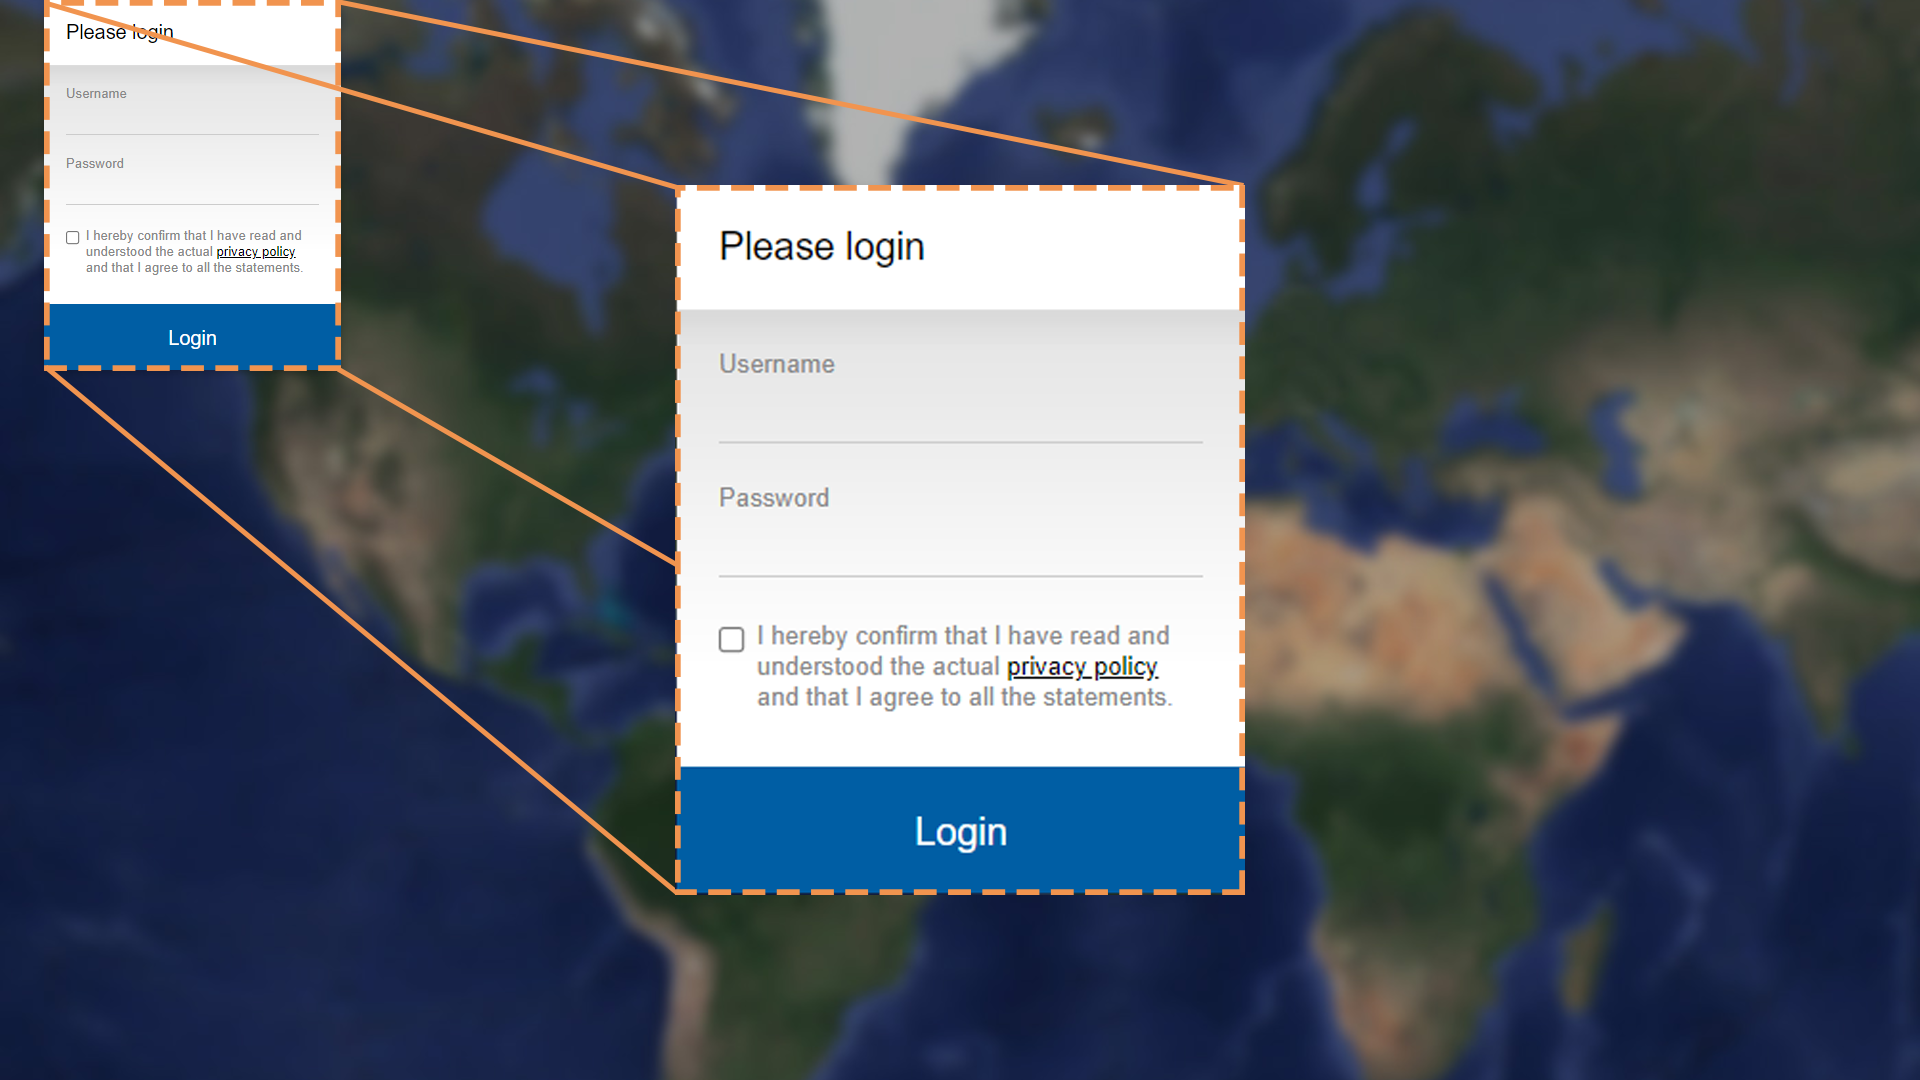
¶ Logging in
Upon visiting MK siteview, you will come across a simple login page where you can input the username and password as we have supplied you.
This includes a checkbox and a link to the privacy policy which needs agreeing to, before logging in. This is so that users are aware that their movements around the website are being logged for security (to protect image privacy, for example) and site improvement purposes.
¶ Appearance and permissions 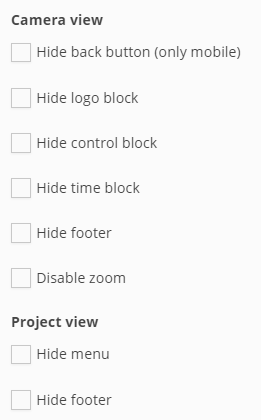
We may have already found your company's logo to put at the upper-left-hand corner of your MK siteview archive.
If this isn't correct or not quite right, feel free to ask us to remove/change it, or supply us with a correct image file via email attachment or link.
Depending on what level your login details are (Client, Project or Guest), you may find that you have more or fewer options than those listed below.
Our direct Clients have authority over this, and can contact us to change what is available to each user, or enabled in the camera view settings.
 We can control whether users are allowed to download: images, cropped images, batches of images or automatically created videos.
We can also hide various parts of the interface, and choose at what position or zoom level the archive opens in.
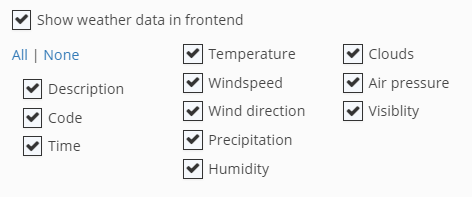
Per camera, we can also show or hide all or parts of the local weather data.
¶ Project view
¶ Multiple projects
If you have several projects with us and have been given a Client-level login, the first screen you’ll see when using those login details is an overview of all of them:
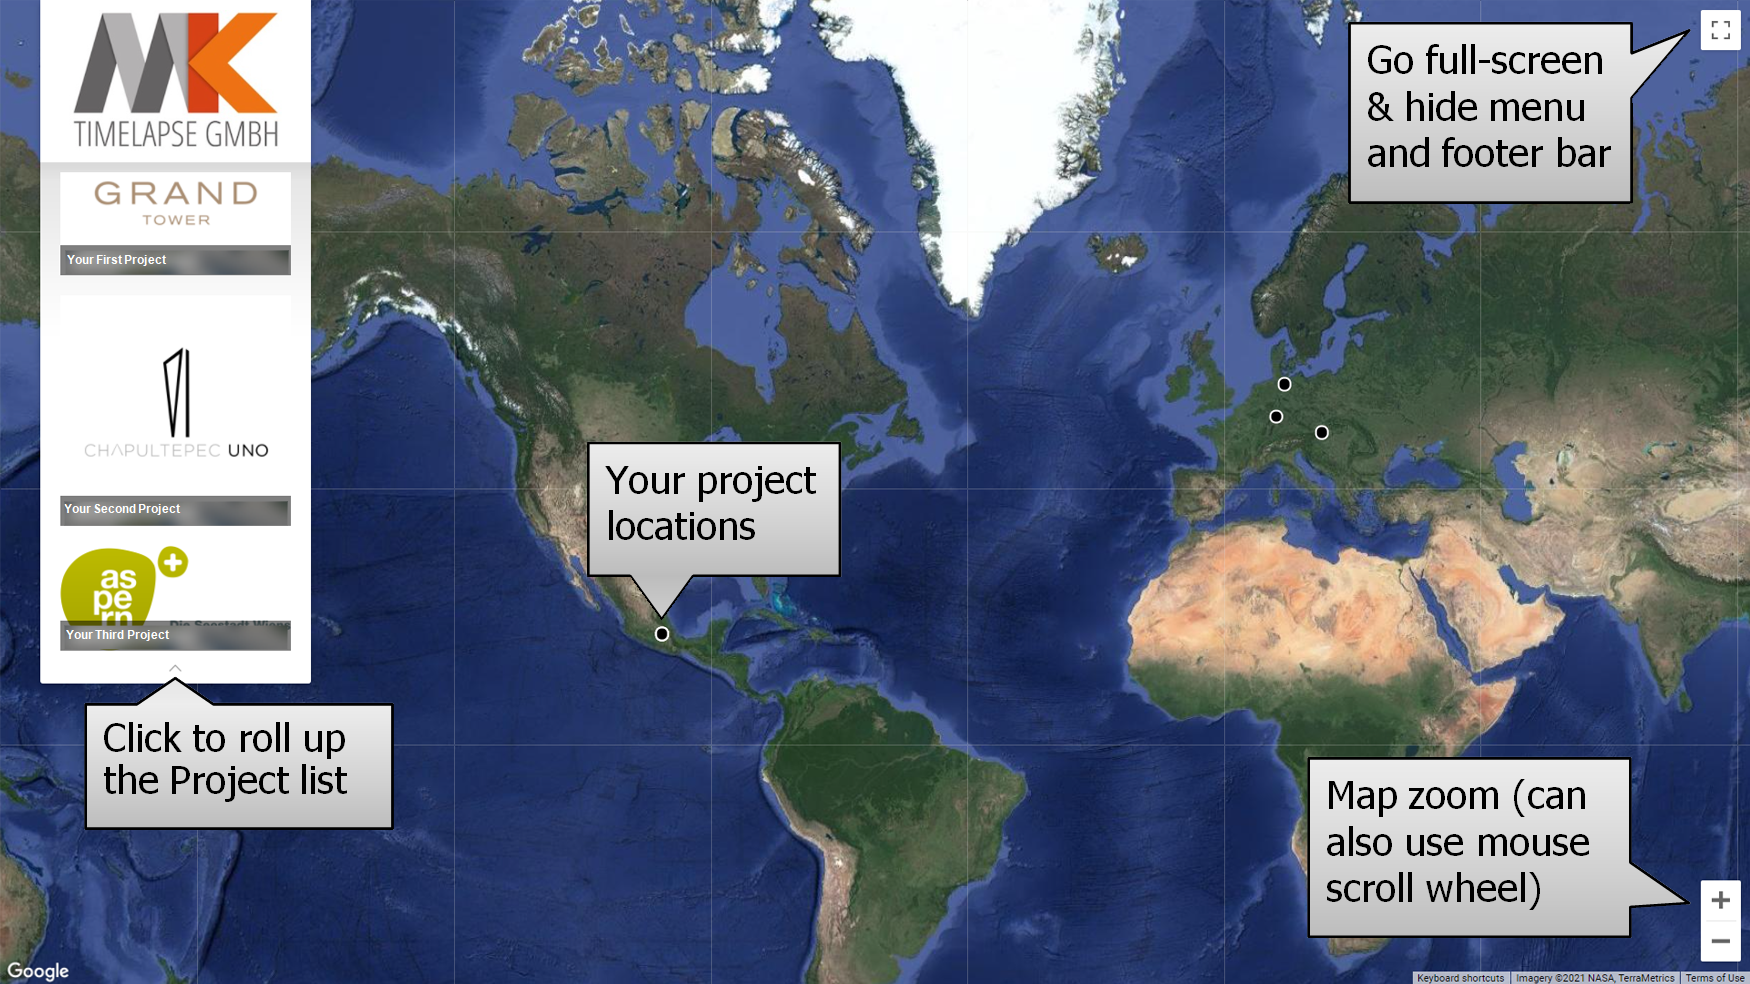
You can scroll down the projects in the menu, or pick from one of the pulsating dots on the world map. If all your projects are relatively close to each other, this map will just zoom out just far enough to get them all on one screen.
As this screen has an embedded Google Satellite Map, you can of course zoom and pan by scrolling and dragging as you would in Google Maps. You can remove the menu by using the button in the top right, or go into full screen and back again using your F11 key. An arrow button under the menu rolls it out of the way.
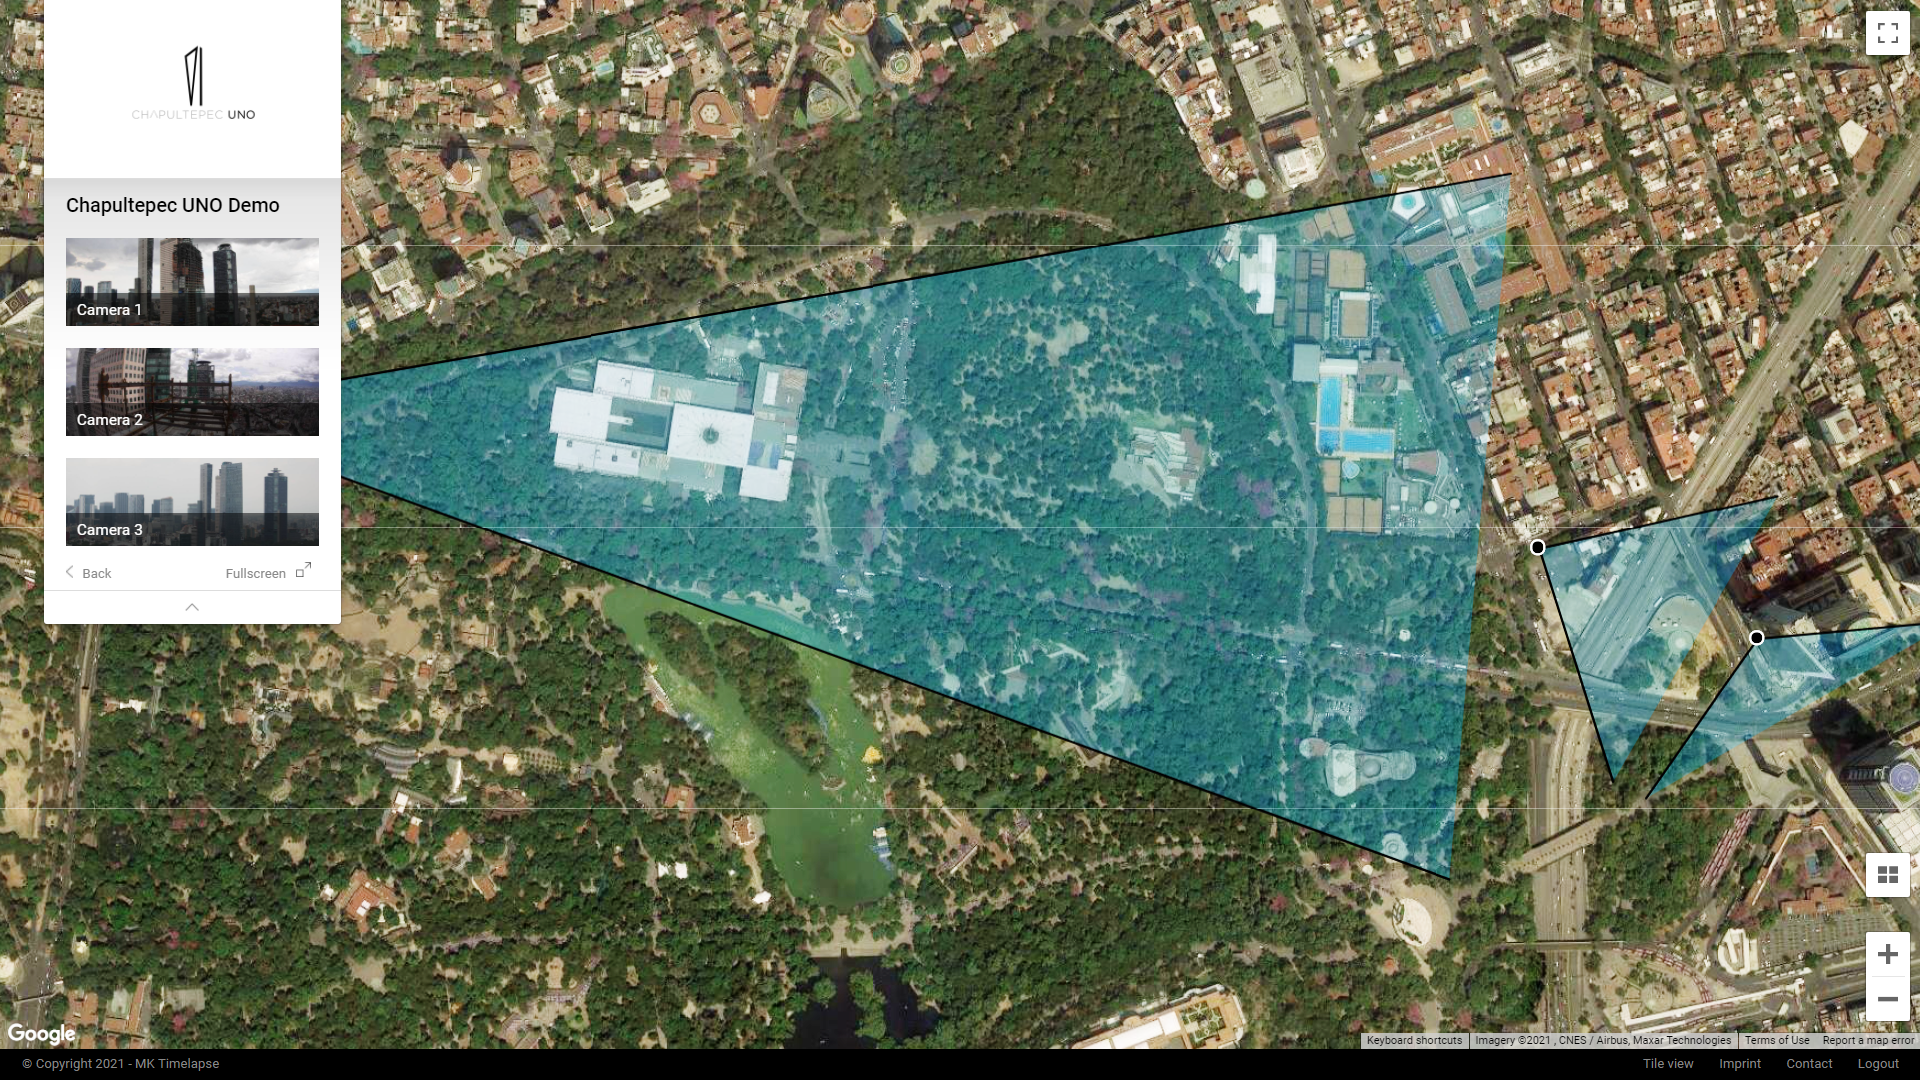
¶ Single project
If you have a single project with us, it will be opened immediately, showing a bird’s eye view of the area with location and field-of-view indicators for each camera.
If you have a project blueprint, a PDF or high-resolution image of your project from directly above, we can overlay this onto the project page. This can be useful for a project that isn't yet visible on Google Maps.
Full screen links and buttons work in the same way as above in the project overview:
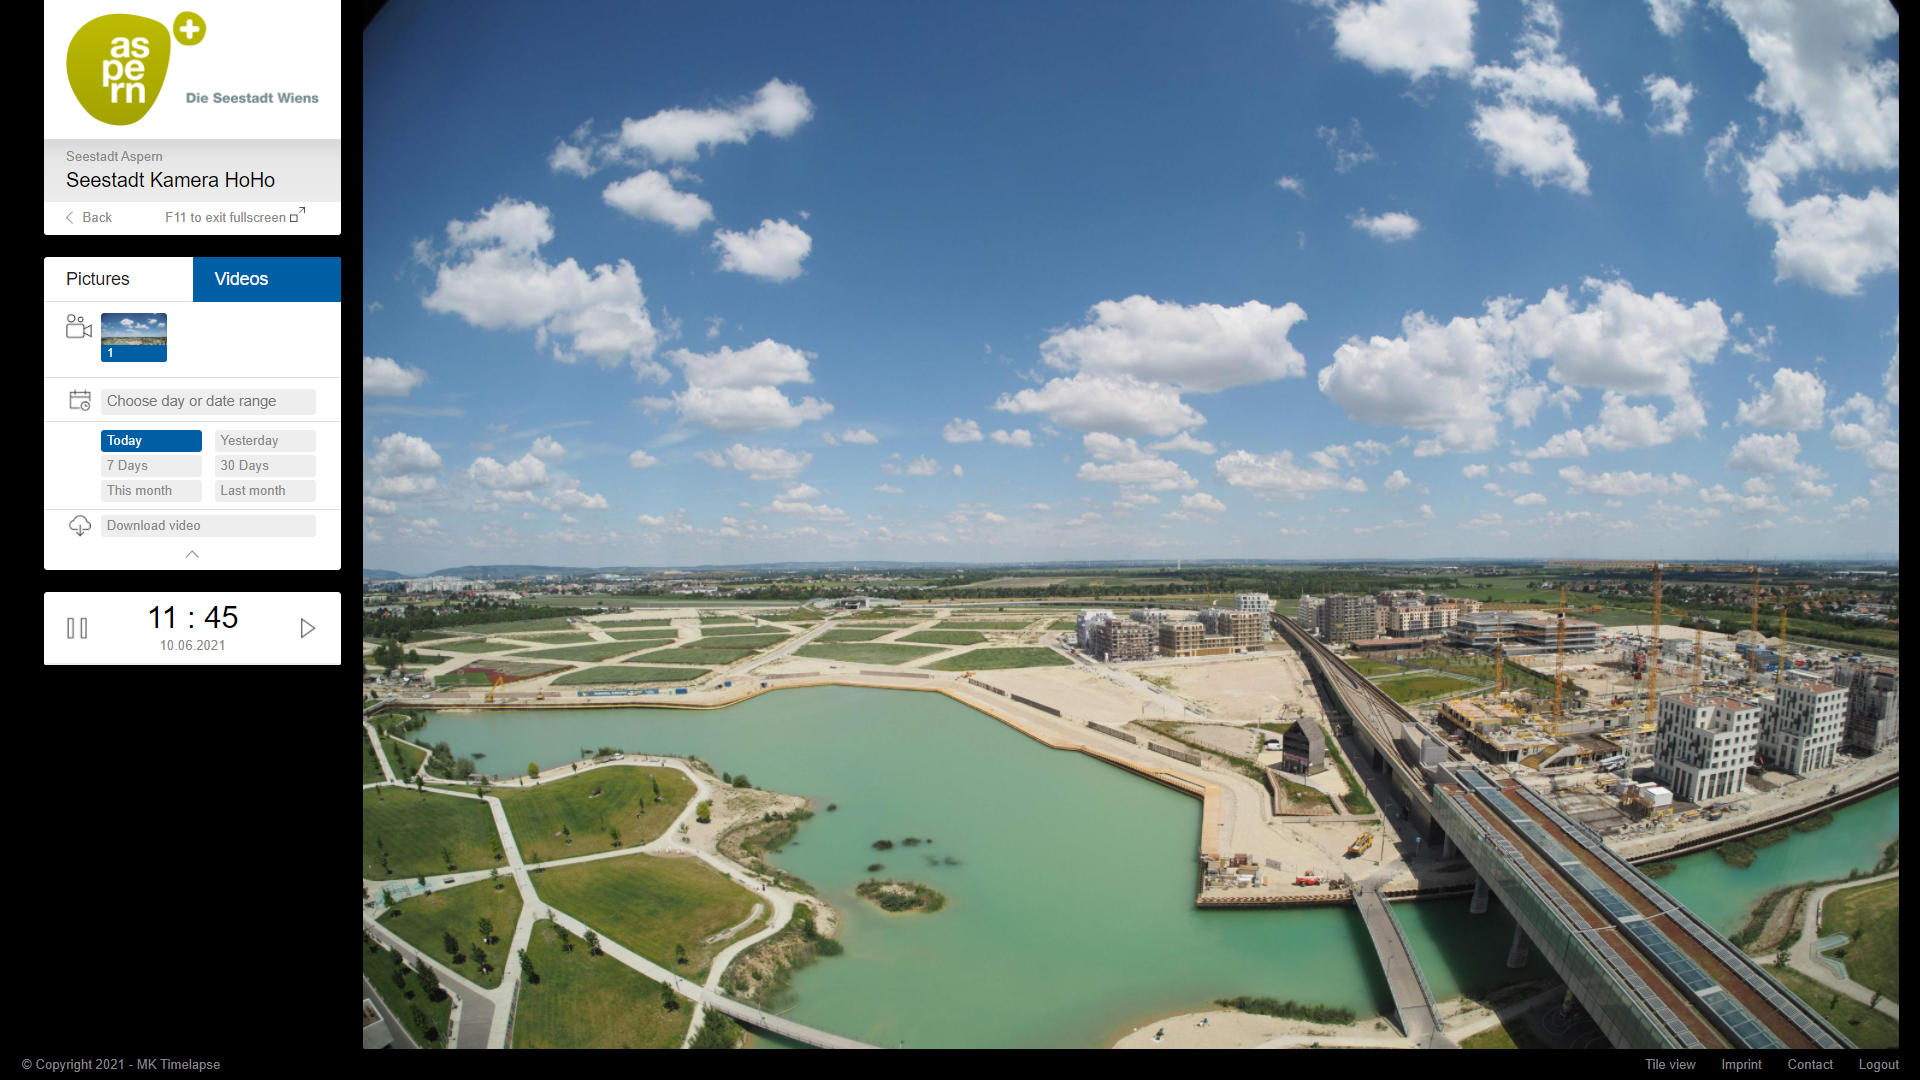
¶ Camera view
There are several parts to the camera view:
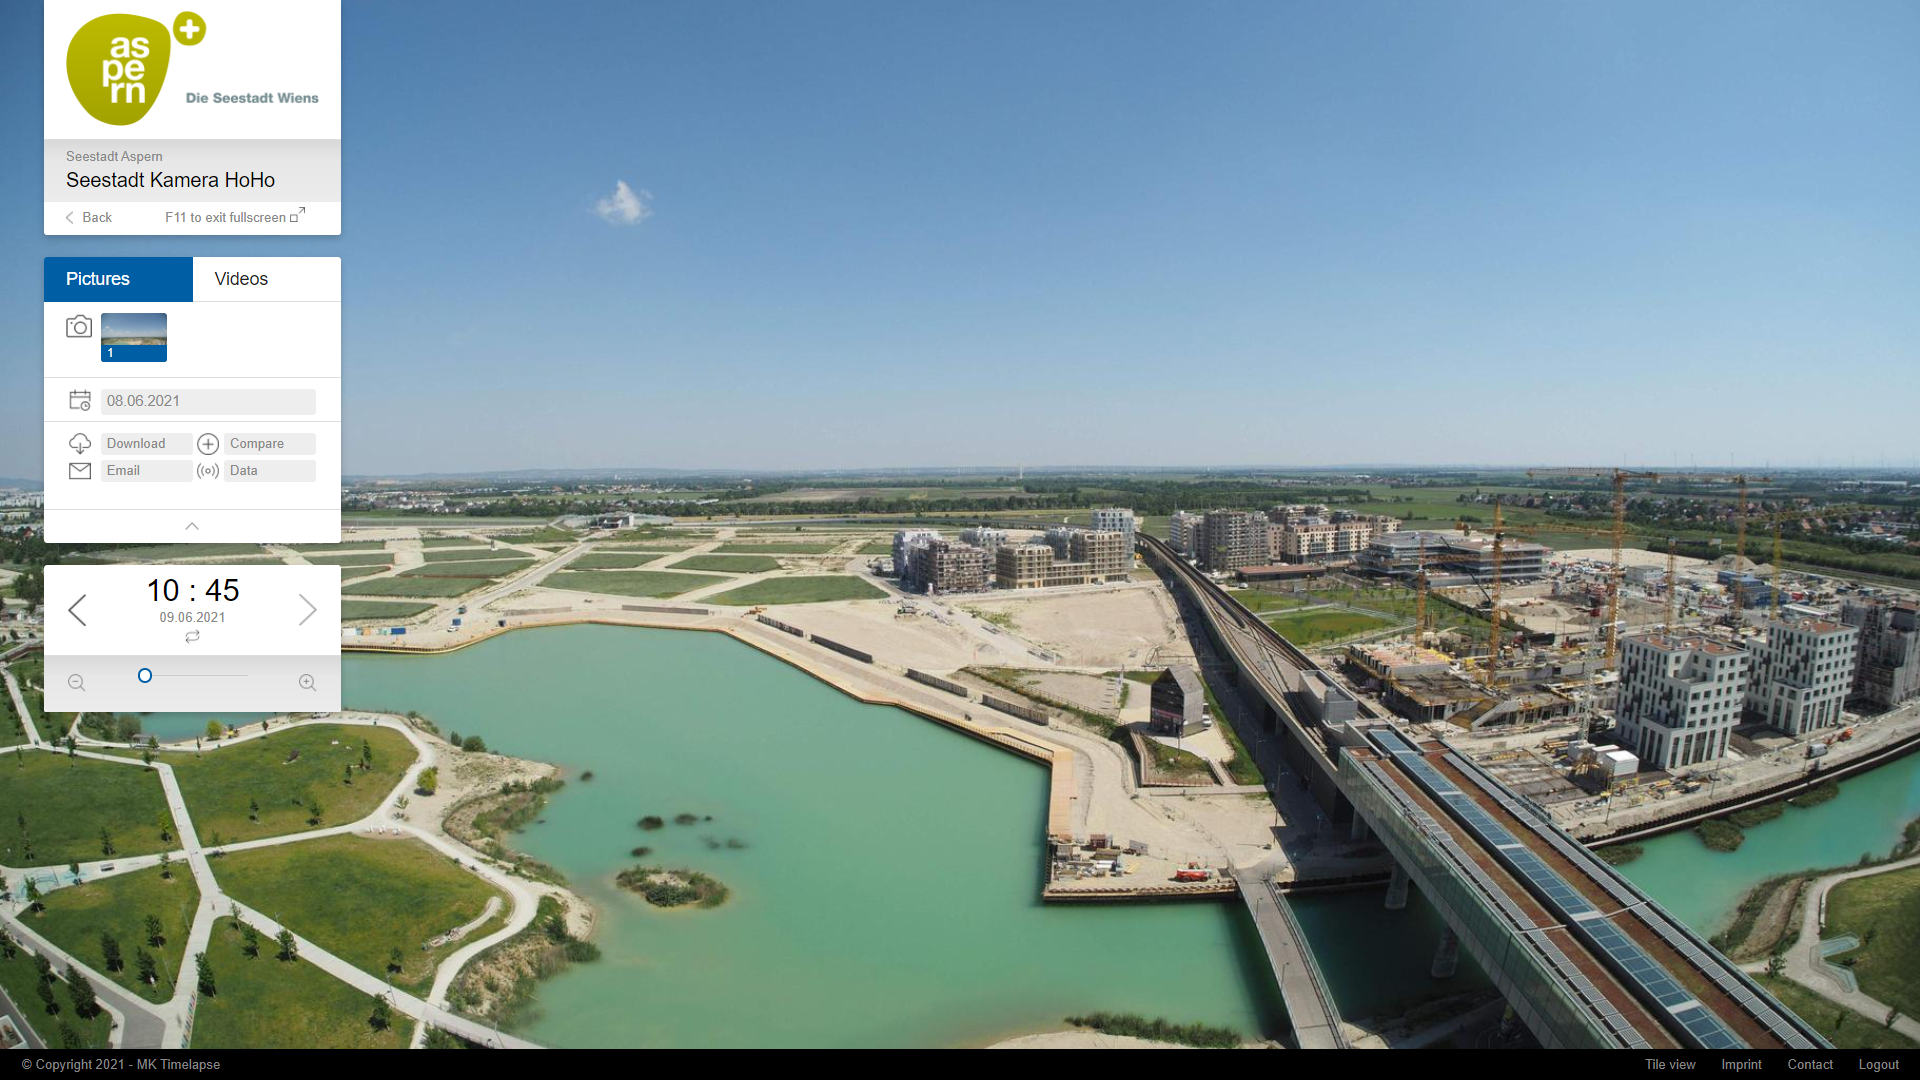
¶ Pictures tab 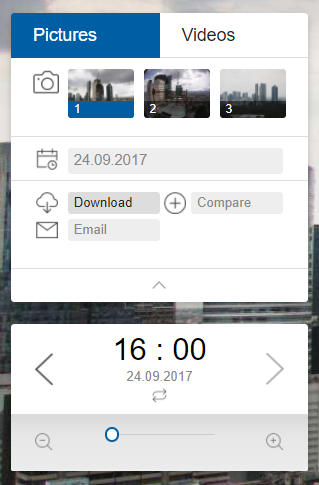
The default view when opening an MK camera instance is this pictures tab. From here you can browse the images uploaded to the archive from your camera.
Depending on project requirements and the amount of data and bandwidth available through local SIM cards, an image may be uploaded anything between once every 5 minutes, and once an hour. Your cameras will still be recording an image every minute, regardless of the upload frequency.
¶ Camera Switcher
At the top of the tab, you will see numbered thumbnails – these are to allow easier switching between the cameras in your project.
Cameras from other providers can be added to a project, as long as they have an https:// link.
They will then feature on the main project page, as well as having a thumbnail in the switcher.
They will however not be browse-able in the same way as a native MK camera, instead opening in a new window or in a pop-up within MK siteview.
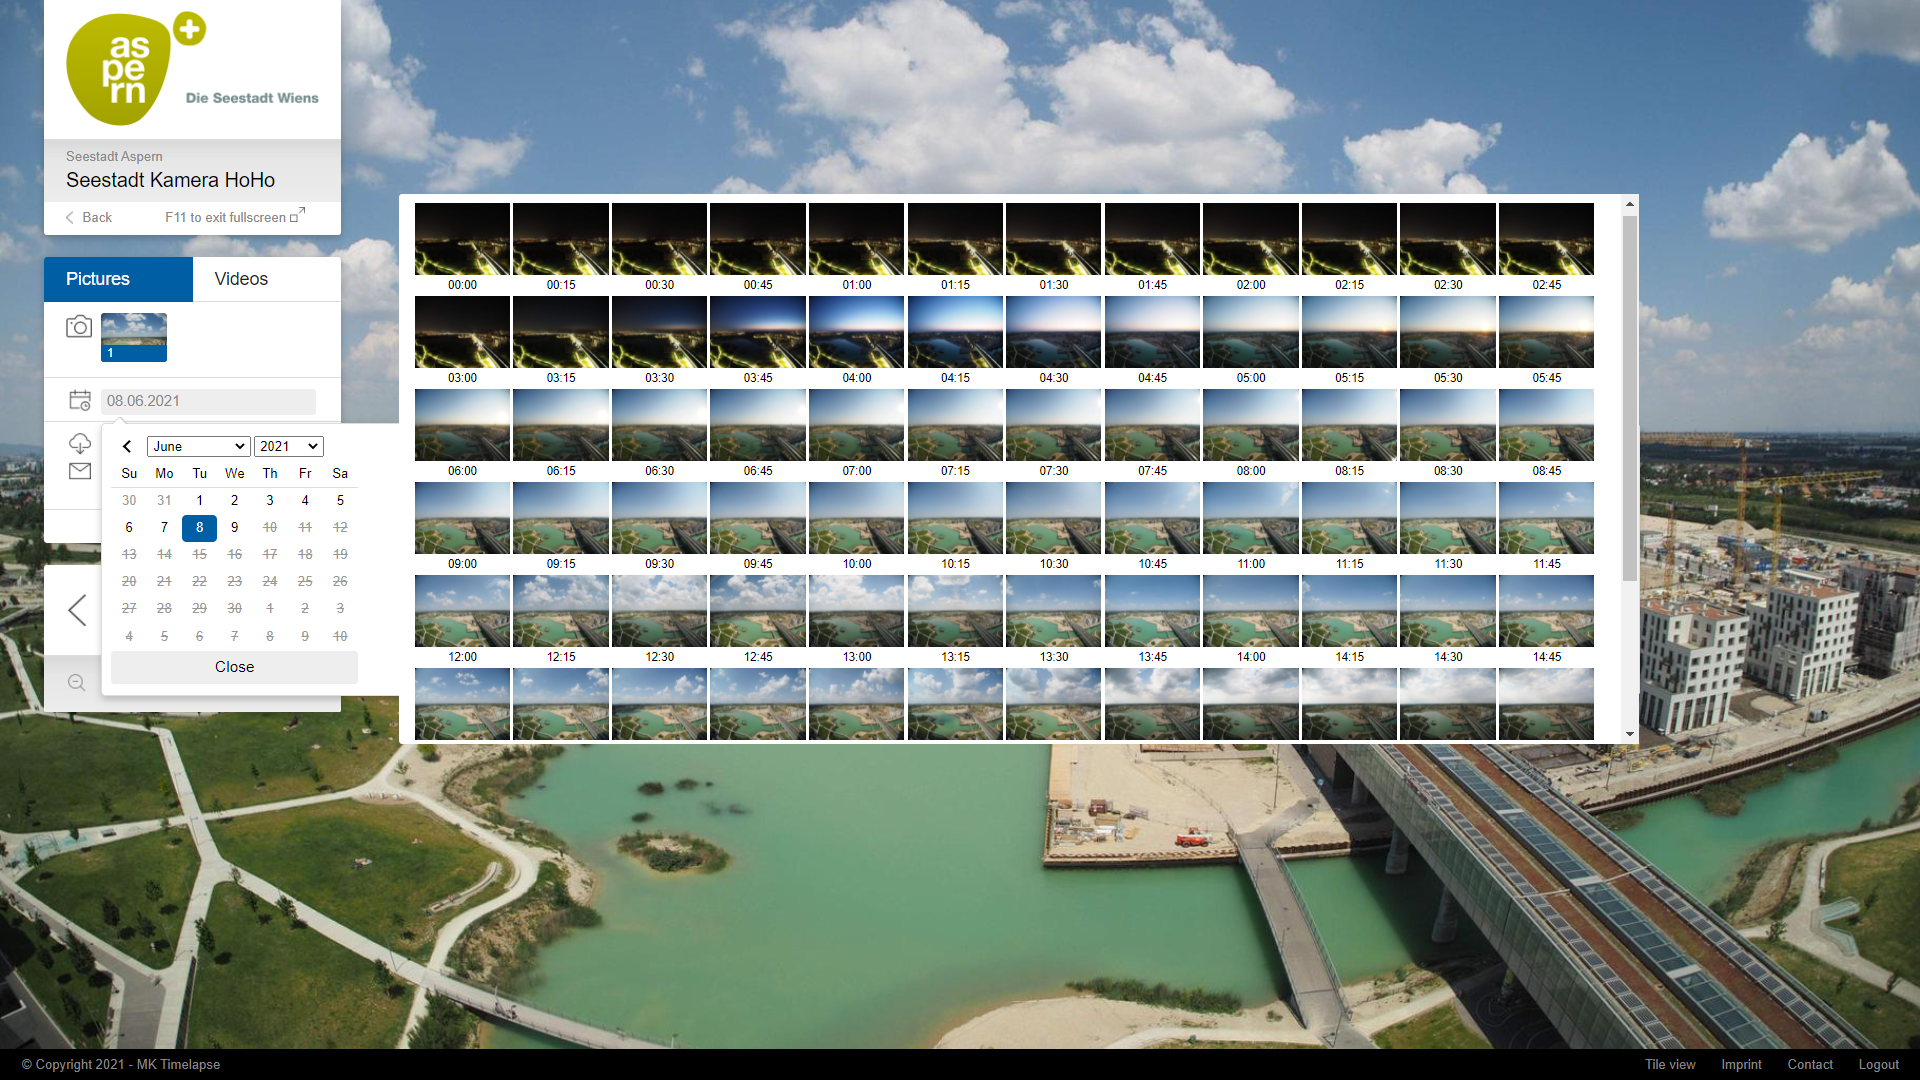
¶ Calendar
The calendar can be brought up by clicking on the date box under the switcher. Through this you can browse specific days, scrolling through thumbnails to find an image from a particular time of day. Use your mouse scroll wheel or the scrollbar on the side to view the day’s images.
Drop down boxes as well as arrows allow quick browsing across years and months.
Days without any pictures available are displayed as greyed-out and struck through.
Some of the buttons mentioned below are options that can be switched on or off.
Please contact us if you want to change the appearance of your MK siteview instance.
¶ Download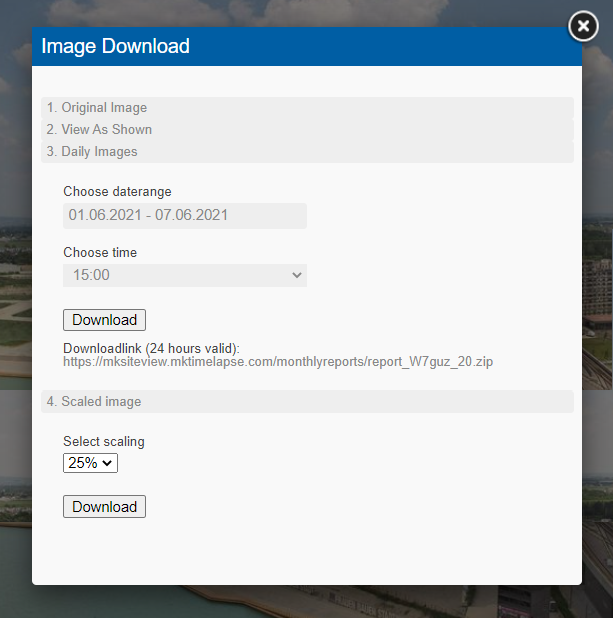
The download dialog box has several buttons to choose from:
- Original Image opens a dialog box to save the entire current image.
- View As Shown crops the image to be downloaded to the area you can currently see on screen.
- Daily Images collates one picture per day taken at the chosen time within the given date range into a *.zip file for download.
- Scaled image saves the original image scaled down to your chosen size.
The Email button under Download on the Pictures tab allows you to immediately send the original image (option 1. above) as an email attachment.
¶ Compare
The compare tool is a useful feature for fast switching between two pictures to check for small differences.
As you browse through the pictures from one camera, you can click on the Compare button to add it to the Compare window, which will appear at the top-right of your screen.
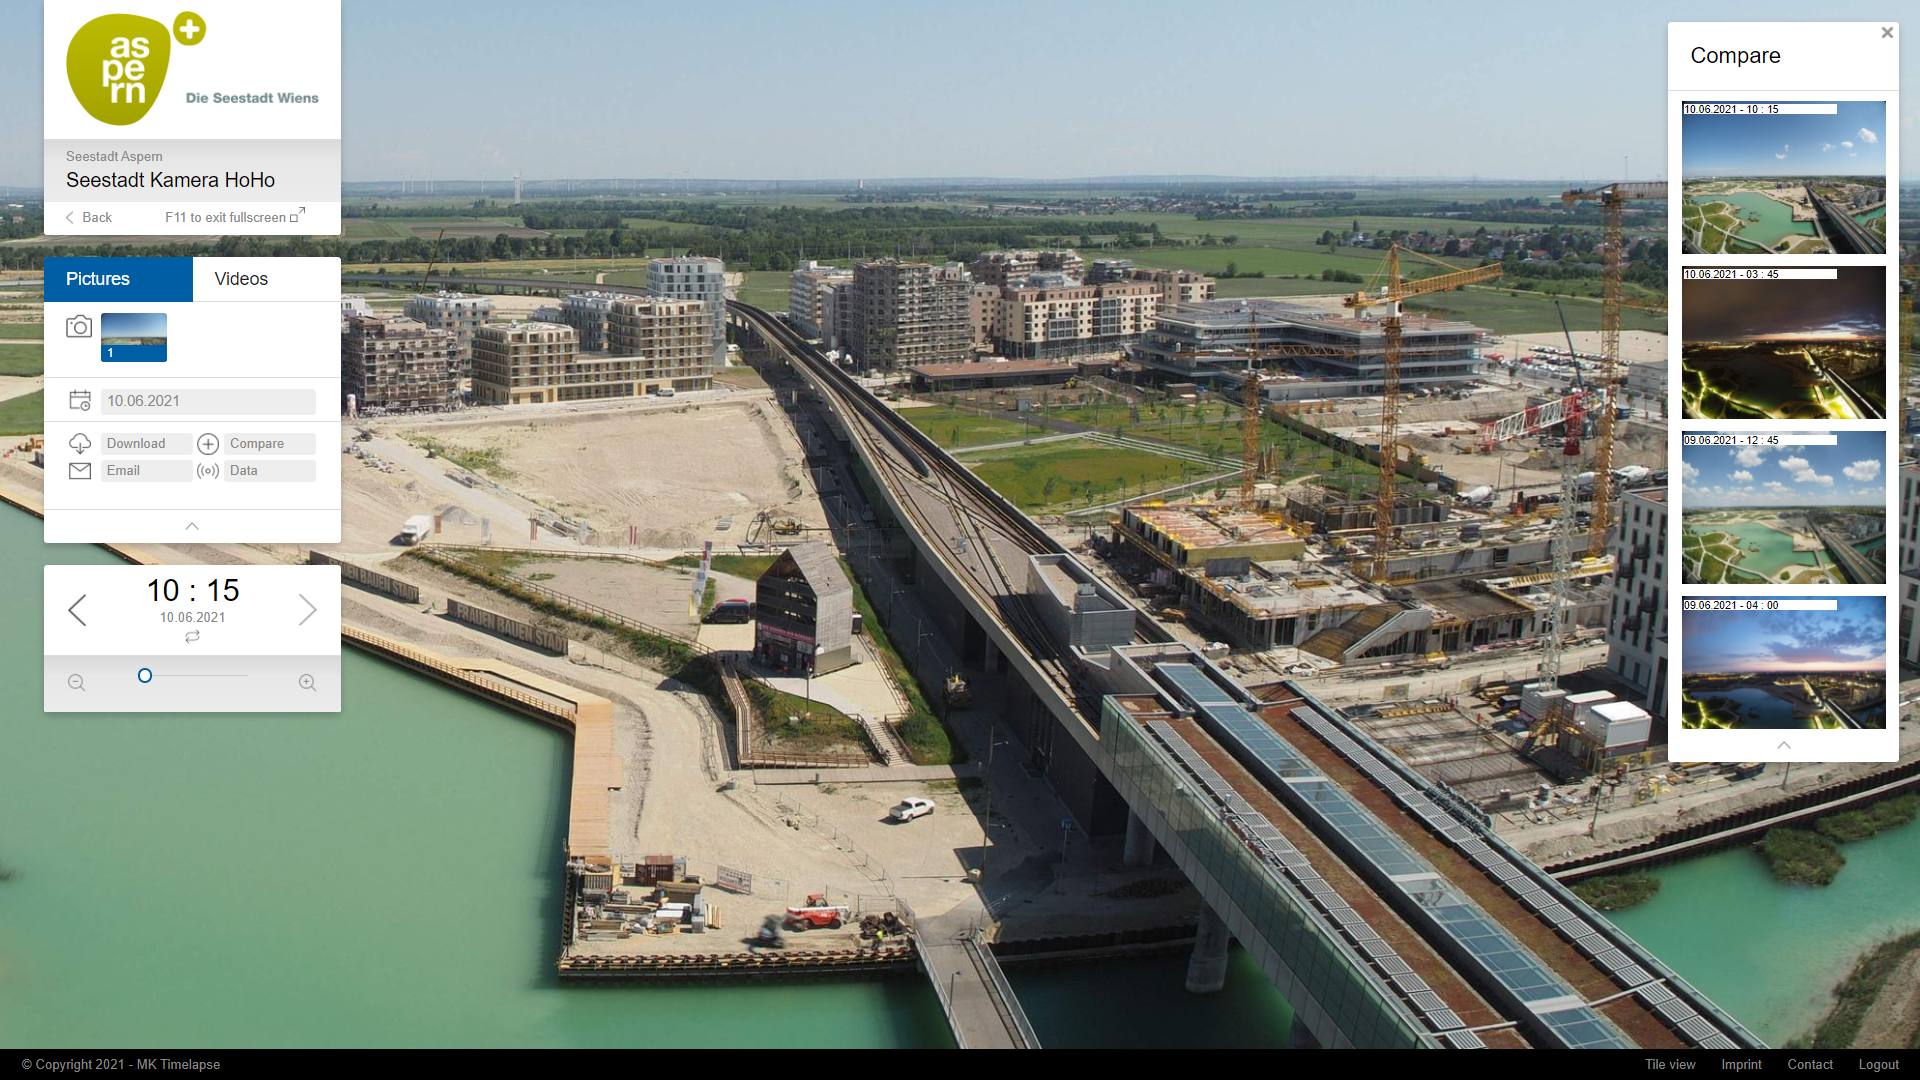
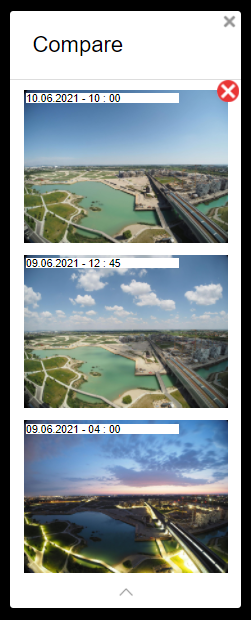
Hovering over a picture in the Compare window will change the picture being shown full-screen. Moving your cursor between the thumbnail images allows fast flipping between two or more shots, to see small differences and changes.
To change the pictures in the compare window, hovering over them will not only change the view, but also bring up a close button (x) in the corner, to click for removal out of the list.
The size of the compare window can be adjusted, so please let us know (ideally in terms of % of the full image) if you'd like this to be changed.
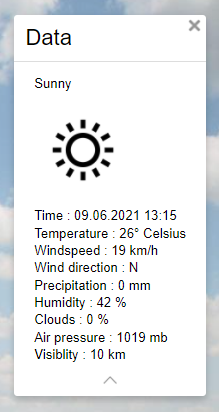
¶ Data
The Data option can show weather statistics based on the location of the camera.
Please let us know if you'd like this option enabled or disabled.
¶ Browse & zoom
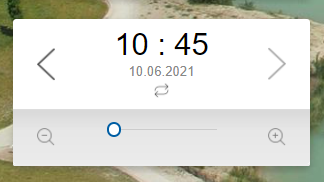 This shows you the time and date of the picture currently in view, giving you forward > and backward < arrows with which to move forwards or backwards in time, one image at a time.
The zoom bar can be used when the user has no scroll wheel or pinch-to-zoom available. Click on the bar, the little + and – magnifying-glass symbols, or drag the slider button to zoom in and out. Click and drag anywhere on the image to move it around and change the view.
¶ Videos tab
At the top of the menu, you can pick the Videos tab. Before we create our films (which are usually formatted in a cinematic 16:9 aspect ratio), our cameras shoot images in a 4:3 aspect ratio. Under this tab, you will see the entire image, so if your monitor is a 16:9 monitor you may therefore see dark bars down the sides:
¶ Camera switcher
As before, at the top of the tab, you will see numbered thumbnails – to allow easier switching between the cameras in your project while remaining in the Camera area of the interface.
¶ Calendar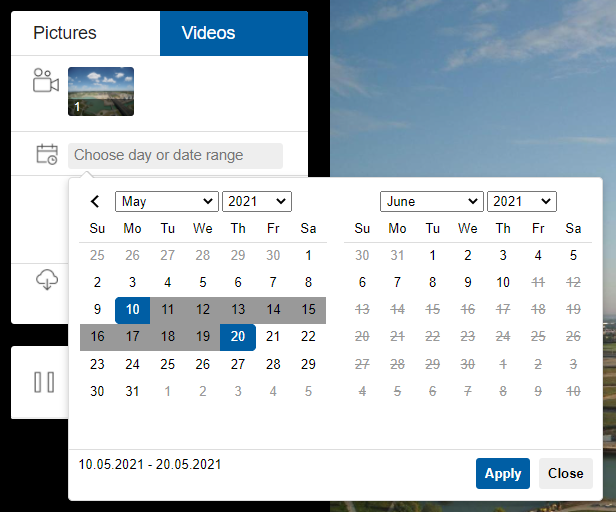
The calendar can be brought up by clicking on the date box under the switcher. This calendar differs from the Pictures tab calendar, as it asks for a range of dates, from which to create an in-browser slideshow. The range can still be only one day long.
- To pick a range of dates, start by clicking on the chosen Start date, and then click on the end date.
All days in between should now be shaded a dark grey to show your range. Click on Apply to confirm. - To pick a single day, click twice on the same date, and then click Apply.
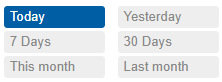
Alternatively, several pre-set date ranges are ready for you to pick in a single click:
¶ Download video
Once you’ve picked the time period over which you’d like the time period to run, you can download a simple unedited time lapse video. The amount of detail in these videos is very limited, as the bandwidth isn't currently available to add every uploaded image into (for example) a month-long video.
Please note, we are proud that our finished time lapse films are of a high-resolution cinematic quality, as they are carefully edited from the raw footage consisting of at least one image per minute. They are created with input from you, to meet your requirements.
These auto-created time lapse videos take images from the archive only – a useful tool, but not our end product.
¶ Play/pause
While you have the Videos tab open, you can also preview the video before downloading it. The last part of the menu as before shows you the time and date of the current image on display, along with pause װ and play > buttons:
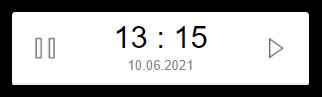
In this case, the > button begins to play the images from the time period chosen. You might see a blue loading bar move across the bottom of this panel. When it is gone, you can press the > button a second time to speed up the preview.
Clicking on װ will slow the footage back down, or pause it once you have come back to the slowest speed.
Picking a large time period, and clicking many times on the > button in quick succession may result in jumpy results – to avoid this, please keep an eye on the blue loading bar.